Someone asked on the Konva Discord channel about how to make an infinite background for the stage. This ingenious solution was proposed by @Kristofer[Borgware] and uses fillPatternImage to make a simple solution. I took inspiration from the approach to make infinite rulers too.
TLDR: Here is the sample code at CodePen.
Requirement
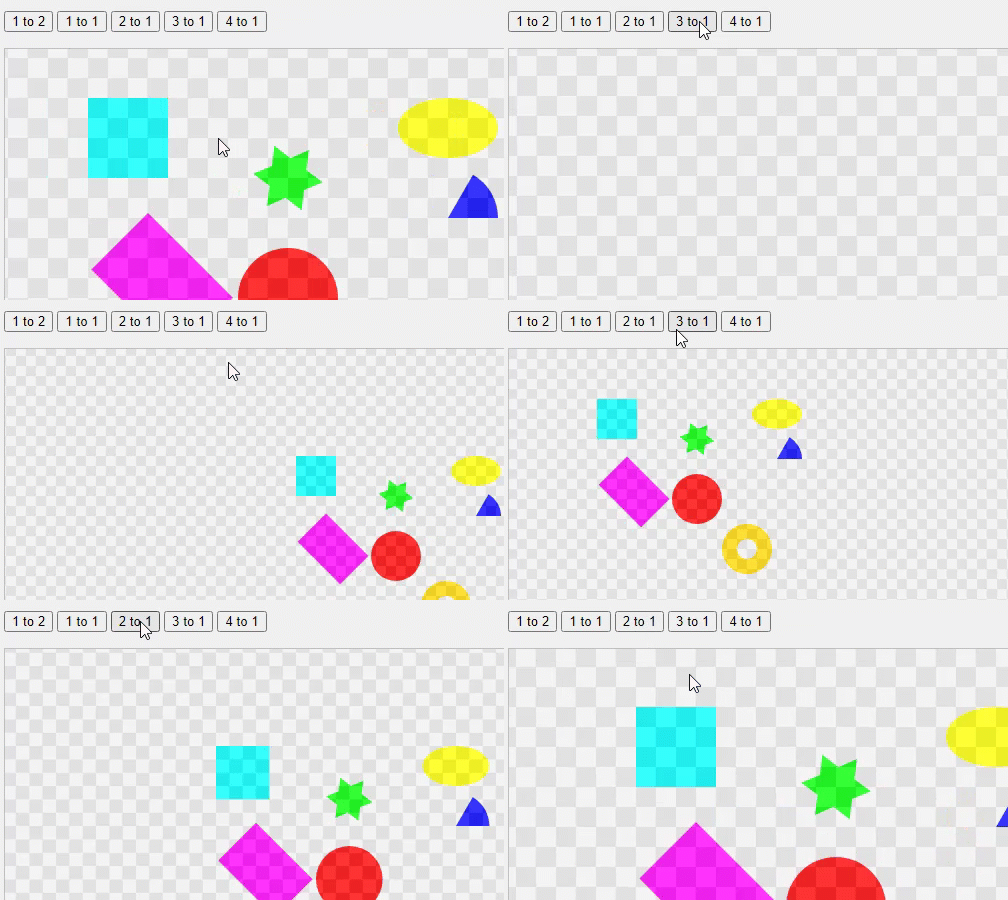
The idea is to have a grid or dot-style background to give the same thing as the artboard in graphics packages like InDesign or PhotoShop. The background should scale as we zoom in and out, and as we scroll around the stage the background should give the impression of being fixed - so it seems to stay put as we scroll. Here's a blown up version - my tile is 80 x 80 with the dark squares 40 x 40.

And the grid should be infinite with very low code overhead. And it should also be optimised for performance - we don't want to have to create a massive image in the background just in case the user scrolls to some distant location. Oh, and we don't want to have to add thousands of performance hurting rects or images to get the effect. [So may 'ands' - I am starting to sound like your boss ;-) ]
The solution
Good news then - you can polish this off in 10 mins and go for coffee & cake.
This solution uses a single image drawn into a single rect using the fillPatternImage method. Quick aside - we normally reach for a Konva.Image to display images but we can also use images in the fill - via fillPatternImage - for other shapes, so anything with a fill property can have a pattern fill. The fillPattern lets us tile the image into the shape.
So, we can place a rect, sized to match the canvas dimensions (this is important - not the same size as the stage, only the size of the canvas element), with a small background image tiled over it and the magic part of the solution is that we use the stage position to set the small fillPatternOffset that we need to keep the background apparently static.
What ? Ok that last bit is important. We can't just stick the rect in the top corner of the visible slice of the canvas and do nothing else. Imagine if we have as our background tile a 20px image with four squares - two diagonal squares filled silver and two filled white. If we tile that it will give us a pleasing grid affect. But if the user drags the stage to {x: 5, y: 0} we need the tiles to move to {x: -5, y: 0} to maintain the illusion that it is moving with the stage.
Conceptually this means we could be targeting the pattern to start some huge distance from the current view - for example if we move the stage to (x: 10,000, y: 0) at 1:1 scale then the pattern offset will be -10,000. We can effectively ignore the possible performance concern of this as the canvas internals take care of optimising it by clipping off the part we can't see. If we were concerned about this then we could add some math to decide what the minimal pattern offset is based on the stage position, so that we only ever use a pattern offset of one tile dimension max.
This is the basic function that does the background position etc.
function setBackground(){

  // ensure background rect is in the top-left of the canvas
  background.absolutePosition({ x: 0, y: 0 });

  // set the dimensions of the background rect to match the canvas - not the stage!!!
  background.size({
    width: width / stage.scaleX(),
    height: height / stage.scaleY()
  })

  // Calculate the amount the stage is moved - including the effect of scaling
  const stagePos = {
    x: -stage.x() / stage.scaleX(),
    y: -stage.y() / stage.scaleY()
  }

  // Apply that movement to the fill pattern
  background.fillPatternOffset(stagePos)

}
How we get the tile that we use in the fillPattern is the standard process for loading an image - we set up a JS image object and use it's onload to assign the loaded image to our background. If this looks odd because you're new to Konva, take a look at my post for JS pros coming to Konva.
const image = new window.Image();
image.onload = () => {
  background.fillPatternImage(image)
}
image.src = 'source of the image';
And so all we need to do is to call that function whenever the stage is dragged.
stage.on('dragmove', (e) => {

  if (e.target.getClassName() === 'Stage'){

    setBackground()

  }
  else {

    // some other object is being dragged

    ...

  }
});
See the sample code for a working demo.
Possible problems with this approach:
- a ruler. We're using the same rect continuously and we have a simple tile as the background so there's not automatic ruler. You can add on by placing another rect over the first and manipulating the numbering and scale to match the stage position and scaling.
- a full background on a picture grabbed from the entire stage. You may not have realised the point that the background is only visible where the camera is looking - it is not drawn across the entire stage. When we snapshot the stage into an image only the part currently in view in the camera has the background. To fix that, in the code that does the snapshot, extend the background rect to cover the entire stage, take the snapshot, and return the background rect to the camera view size.
Summary
We've seen that we can use a small rect and fillPatternImage with offset to make an infinite background. There's not much more to it than that. Enjoy the coffee & cake.
This post was about infinite background but if you want to see another about infinite rulers then head over to the dedicated post for infinite rulers.
Thanks for reading.
VW March 2024
Image by Greg Rakozy at Unsplash.com